


Gracenote® Update Instructions (for Alpine 3.2 Systems)
The three-step process may take up to 90 minutes from start to completion, depending on your computer and Internet connection. You may need to complete the steps at separate times.
Step 1: Download

Download the Gracenote® Zip File to your computer and "unzip" the file.
Step 2: Transfer

Burn unzipped files to a blank CD.
Step 3: Install

Install the update in your Honda Vehicle
Step 1: Download
Download Steps:
1. Click on the button below to start your download (Estimated download time: 1 hour with DSL).
![]()
Hint: If your browser does not automatically start the download process, be sure your browser or security settings allow files to be downloaded from this Web site. You can also right-click the image and select "Save Link As" to start the download process.
2. Once you have downloaded the file to your computer, locate the file on your Hard-Disk Drive and double-click the file to decompress it (i.e., to return it to its original size).
Hint: If you do not have a decompression program installed on your computer, you can download a free trial copy of WinZip here.
3. Make sure all of the following files from the Gracenote® Download Link have been downloaded and decompressed:
- CDDB (file folder)
- pamenipla.apn
The CDDB folder should contain the following files:
- CDDB_MNG.bin
- elists.inv
- emms.idx
- emms.mdt
- lusseng.db
- lussfre.db
- lussspa.db
- emms_current.cfg
Do not remove any files from the CDDB folder. Files should be transferred to your vehicle in this format.
- CDDB
- pamenipla.apn
Step 2: Transfer
Once all the files are decompressed you'll need to burn the CDDB file folder (containing the files shown in Step 3 above) and pamenipla.apn file to a blank CD or transfer them to a USB flash drive. If you choose to use a CD, it must be a recordable CD-R or CD-RW.
NOTE: CDs created with the built-in Windows CD-burning software cannot be read by the system. You must use a third-party CD-burning program to create the disc.
To transfer the files to your CD or USB flash drive, do the following:
1. Click on the "START" button in your computer's lower left-hand column and select "MY COMPUTER."
2. Locate the CD or USB flash drive icon.
3. Click on and drag the decompressed files listed above onto the CD or USB icon, which will start the transfer process. All of these files must be copied to the root of the CD or the USB flash drive and should not be copied into any folders.
Once this process is complete, you are now ready to install the Gracenote® file in your vehicle.
Step 3: Install
Now that you've downloaded and decompressed all your files, you're ready to install the update. Please note the Gracenote® update may take up to 25 minutes to complete. Your audio system will be fully functional during this time, with the exception of the CD/DVD drive.
Make sure your engine is running during the Gracenote® update installation. Do not run the installation with the key in the ACC position as this may drain your battery.
Honda Gracenote® CDDB Database Update - Vehicle Installation Instructions:
1. With your audio/navigation system turned on, insert the update CD into the drive or the USB flash drive into the USB port.
- - Make sure the audio/navigation system is turned on.
- - Press the Audio button on the audio/navigation unit.
- - Press the HDD button on the touch screen.
- - Press settings on the audio/navigation unit.
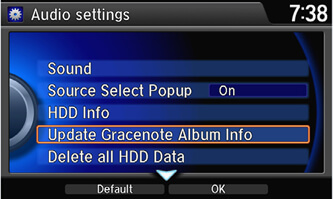
- - Press audio settings.
- - Move the Interface Dial down to select the Update Gracenote® Album Info.
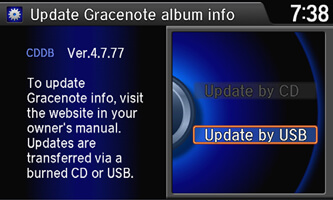
3. Select whether you are using a CD or USB flash drive to update the system.
Note: Selections will remain grayed out until a CD, or USB device is inserted.
4. Select "OK"
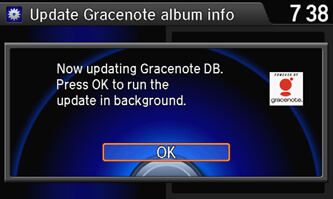
5. When this screen appears, the update is complete.
You're done! Please remove the CD or USB flash drive. Your system is now ready to be used.